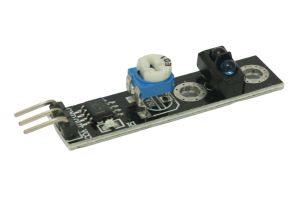
The Line Tracking Sensor module is a versatile component used in robotics and automation projects. It is specifically designed to detect lines on the ground, making it an excellent choice for line-following robots and other applications that require precise tracking. In this step-by-step guide, we’ll show you how to set up the Line Tracking Sensor module with an Arduino and create a simple line-following robot.
Materials Needed:
- Arduino board (e.g., Arduino Uno, Arduino Nano)
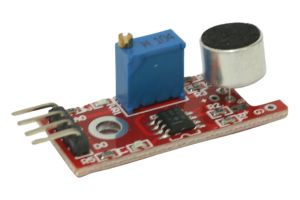
- Line Tracking Sensor module (usually comes with two infrared sensors)
- Motors and wheels (for creating a line-following robot)
- Motor driver (if required for your robot)
- Chassis (optional, for robot construction)
- Breadboard and jumper wires
- USB cable for Arduino
- Computer with the Arduino IDE installed (https://www.arduino.cc/en/software)
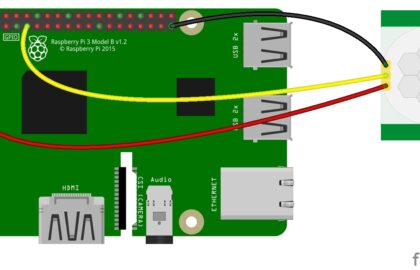
Step 1: Wiring
Connect the Line Tracking Sensor module to the Arduino board as follows:
- Connect the VCC (Voltage) pin to the 5V pin on the Arduino.
- Connect the GND (Ground) pin to the GND pin on the Arduino.
- Connect the module’s OUT1 and OUT2 pins to any digital pins on the Arduino (e.g., D2 and D3).
If you are building a line-following robot, wire the motors and motor driver according to your robot’s specifications. Make sure to connect the motor driver input pins to appropriate digital pins on the Arduino.
Step 2: Coding
Open the Arduino IDE and create a new sketch. Then, enter the following code:
const int leftSensorPin = 2;   // Digital pin connected to the left sensor's OUT1 pin
const int rightSensorPin = 3;  // Digital pin connected to the right sensor's OUT2 pin

void setup() {
  pinMode(leftSensorPin, INPUT);   // Set the left sensor pin as INPUT
  pinMode(rightSensorPin, INPUT);  // Set the right sensor pin as INPUT
}

void loop() {
  int leftSensorValue = digitalRead(leftSensorPin);    // Read the left sensor value
  int rightSensorValue = digitalRead(rightSensorPin);  // Read the right sensor value

  if (leftSensorValue == HIGH && rightSensorValue == LOW) {
    // The robot is on the left edge of the line
    // Turn right or take appropriate action to stay on track
  } else if (leftSensorValue == LOW && rightSensorValue == HIGH) {
    // The robot is on the right edge of the line
    // Turn left or take appropriate action to stay on track
  } else if (leftSensorValue == LOW && rightSensorValue == LOW) {
    // The robot is on the line
    // Continue moving forward or adjust as needed
  } else if (leftSensorValue == HIGH && rightSensorValue == HIGH) {
    // The robot is off the line or in an ambiguous position
    // Take appropriate action to align with the line
  }
}
Step 3: Uploading the code
Connect your Arduino board to the computer using the USB cable and select the appropriate board and port from the Arduino IDE. Then, click the “Upload” button to upload the code to the Arduino.
Step 4: Testing the Line Tracking Sensor
Place the line tracking sensor module on a surface with a visible line, such as a black tape on a white background. When the robot moves over the line, the sensors will detect the contrast and respond accordingly. The robot should follow the line and adjust its course whenever it deviates from it.
Step 5: Building a Line-Following Robot (Optional)
If you are building a line-following robot, mount the line tracking sensors on the robot’s bottom surface, and connect the motors and motor driver according to your robot’s specifications. Use the same code as above for the line-following behavior, adjusting the motor control to make the robot follow the line accurately.
Congratulations! You’ve successfully set up and used the Line Tracking Sensor module with Arduino. Whether you’re creating a line-following robot or working on line detection projects, this versatile sensor offers precision tracking capabilities. Enjoy exploring the world of robotics and automation with the Line Tracking Sensor module and Arduino!


