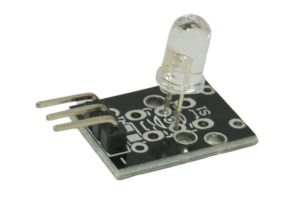
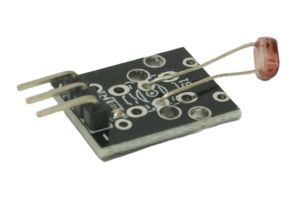
The IR Emission Module is a fascinating component that allows your Arduino projects to transmit infrared signals. It can be used for remote control applications, IR communication between devices, and more. In this step-by-step guide, we’ll show you how to set up the IR Emission Module with an Arduino and create projects that send invisible signals to interact with other devices.
Materials Needed:
- Arduino board (e.g., Arduino Uno, Arduino Nano)
- IR Emission Module (e.g., IR LED)
- Breadboard and jumper wires
- USB cable for Arduino
- Computer with the Arduino IDE installed (https://www.arduino.cc/en/software)
Step 1: Wiring
Connect the IR Emission Module to the Arduino board as follows:
- Connect the module’s VCC (Voltage) pin to the 5V pin on the Arduino.
- Connect the module’s GND (Ground) pin to the GND pin on the Arduino.
- Connect the module’s S (Signal) pin to a digital pin on the Arduino (e.g., D3).
Step 2: Arduino Code
Open the Arduino IDE and create a new sketch. Then, enter the following code:
const int irEmissionPin = 3; // Digital pin connected to the IR Emission Module

void setup() {
  pinMode(irEmissionPin, OUTPUT); // Set the IR Emission pin as OUTPUT
}

void loop() {
  // Send an IR signal (Customize the signal according to your application)
  sendIRSignal();

  delay(5000); // Wait for 5 seconds before sending the next signal
}

// Function to send a custom IR signal (e.g., for remote control or communication)
void sendIRSignal() {
  // Customize the IR signal transmission based on the protocol of your application
  // You can use libraries like IRremote or create custom protocols.

  // Example: For NEC protocol (using IRremote library)
  // #include <IRremote.h>
  // IRsend irSender(irEmissionPin);
  // unsigned long data = 0x00FFA857; // Replace with your custom IR code
  // irSender.sendNEC(data, 32);
}
Step 3: Uploading the code
Connect your Arduino board to the computer using the USB cable and select the appropriate board and port from the Arduino IDE. Then, click the “Upload” button to upload the code to the Arduino.
Step 4: Invisible Communication
Once the code is uploaded successfully, the IR Emission Module will repeatedly send the custom IR signal you defined in the sendIRSignal() function.
Step 5: Experiment and Transmit
Now that the IR Emission Module is set up and transmitting IR signals, you can experiment with different protocols and custom IR codes. You can use this module for remote control projects, IR communication with other devices, or any application that involves transmitting invisible signals.
Congratulations! You’ve successfully set up and used the IR Emission Module with Arduino. This remarkable module allows your Arduino projects to communicate with other devices using invisible infrared signals. Have fun experimenting and incorporating the IR Emission Module into your Arduino projects to become an invisible communicator!


