In the realm of Arduino projects, integrating displays is a common and rewarding endeavor. One particularly versatile choice is the 16×2 LCD (Liquid Crystal Display) with an I2C (Inter-Integrated Circuit) interface. This guide will walk you through the seamless process of connecting a 16×2 I2C LCD display to your Arduino, offering a convenient solution for visualizing data in your projects.
Understanding 16×2 I2C LCD Displays
A 16×2 I2C LCD display combines the simplicity of a standard LCD with the advantages of the I2C communication protocol. The I2C interface significantly reduces the number of wires required, simplifying the wiring process and leaving more room for creativity in your projects.
Hardware Components
Before diving into the coding, gather the following components:
- Arduino Board (e.g., Arduino Uno)
- 16×2 I2C LCD Display
- Jumper Wires
- Breadboard
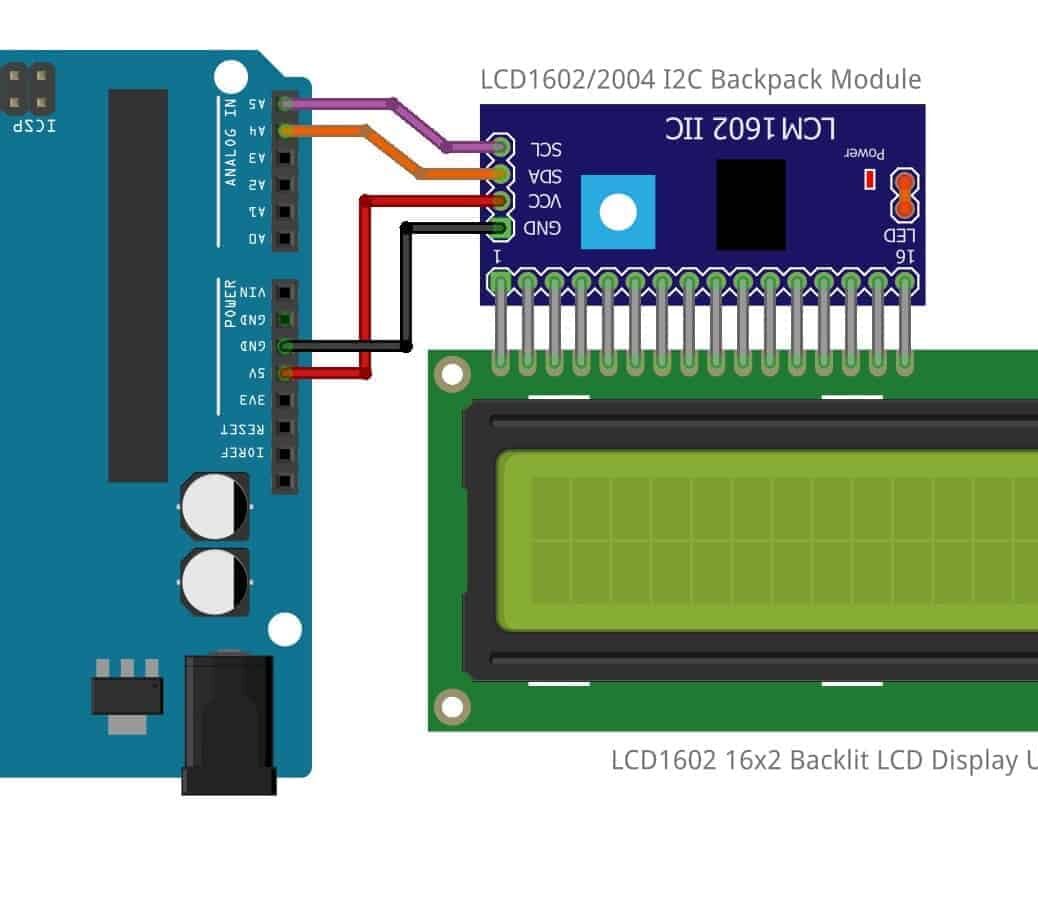
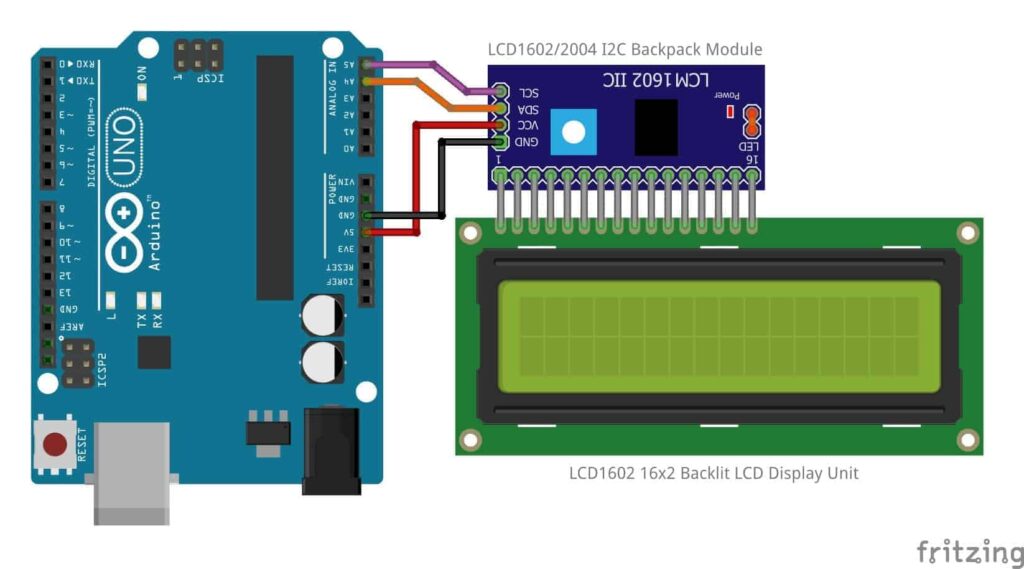
Wiring the I2C LCD Display
Connect the 16×2 I2C LCD display to the Arduino as follows:
- VCC to 5V on Arduino
- GND to GND on Arduino
- SDA to A4 on Arduino
- SCL to A5 on Arduino
Ensure the connections are secure and double-check the pin mappings.
Installing Necessary Libraries
Open the Arduino IDE, navigate to “Sketch” > “Include Library” > “Manage Libraries.” Search for “LiquidCrystal_I2C” and install the library.
Writing the Code
Now, let’s create a simple Arduino sketch to display text on the I2C LCD screen:
#include <Wire.h>
#include <LiquidCrystal_I2C.h>

// Set the LCD address to 0x27 for a 16x2 display
LiquidCrystal_I2C lcd(0x27, 16, 2);

void setup() {
  // Initialize the LCD
  lcd.begin(16, 2);
  // Turn on the backlight (optional)
  lcd.setBacklight(HIGH);


  // Print a message to the LCD
  lcd.print("Hello, Arduino!");
}

void loop() {
  // Nothing to do here
}
This code initializes the I2C LCD display and prints “Hello, Arduino!” on the screen.
Uploading the Code
Connect your Arduino to your computer, select the correct board and port in the Arduino IDE, and upload the code.
You’ve successfully integrated a 16×2 I2C LCD display with Arduino, streamlining the display setup for your projects. Explore the possibilities of showcasing sensor data, creating dynamic interfaces, or developing informative displays with ease. Enjoy your Arduino journey with the enhanced convenience of I2C connectivity.


