The Raspberry Pi, a versatile single-board computer, can be transformed into a powerful motion detection system with the addition of Passive Infrared (PIR) sensors. In this step-by-step guide, we’ll walk you through the process of setting up motion detection using a Raspberry Pi and PIR sensors.
Materials Needed:
- Raspberry Pi (any model with GPIO pins)
- MicroSD card (8GB or larger) with Raspbian OS installed
- PIR (Passive Infrared) sensor
- Jumper wires
- Breadboard
- USB power supply for Raspberry Pi
- USB keyboard and mouse (for initial setup)
- HDMI monitor (for initial setup)
Step 1: Setting up the Raspberry Pi
- Download Raspbian OS: Visit the official Raspberry Pi website and download the latest version of Raspbian. Follow the instructions to install it on the microSD card.
- Connect Peripherals: Insert the microSD card into the Raspberry Pi. Connect the USB keyboard, mouse, and HDMI monitor. Power up the Raspberry Pi using the USB power supply.
- Initial Configuration: Follow the on-screen instructions to set up the Raspbian OS. Make sure to enable SSH and configure your Wi-Fi network if needed.
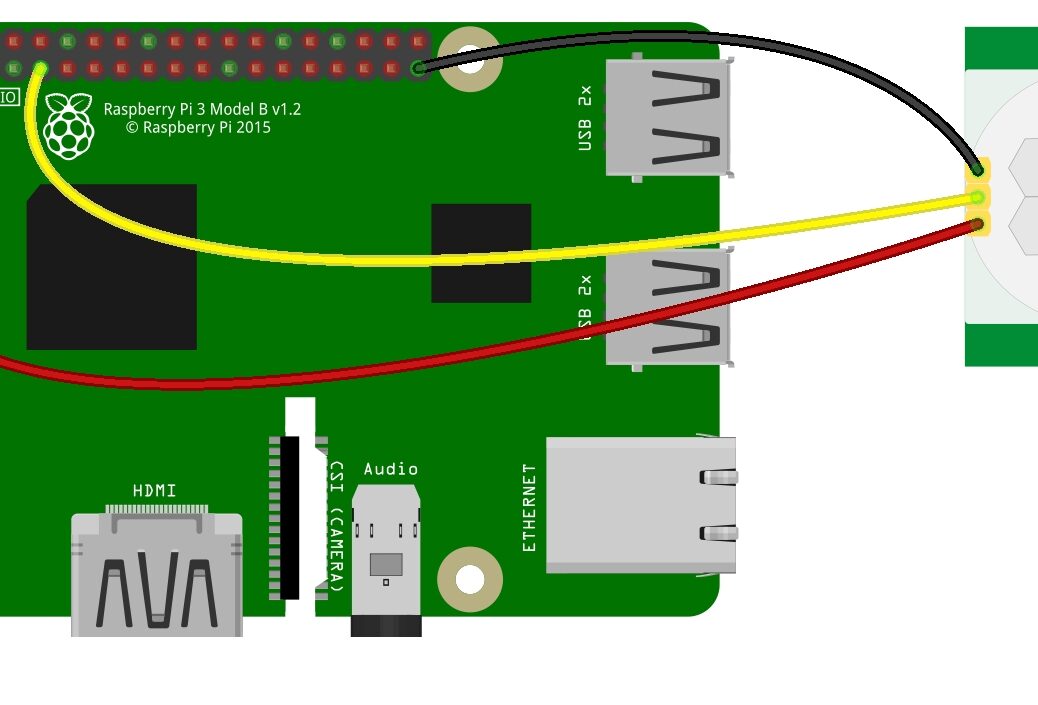
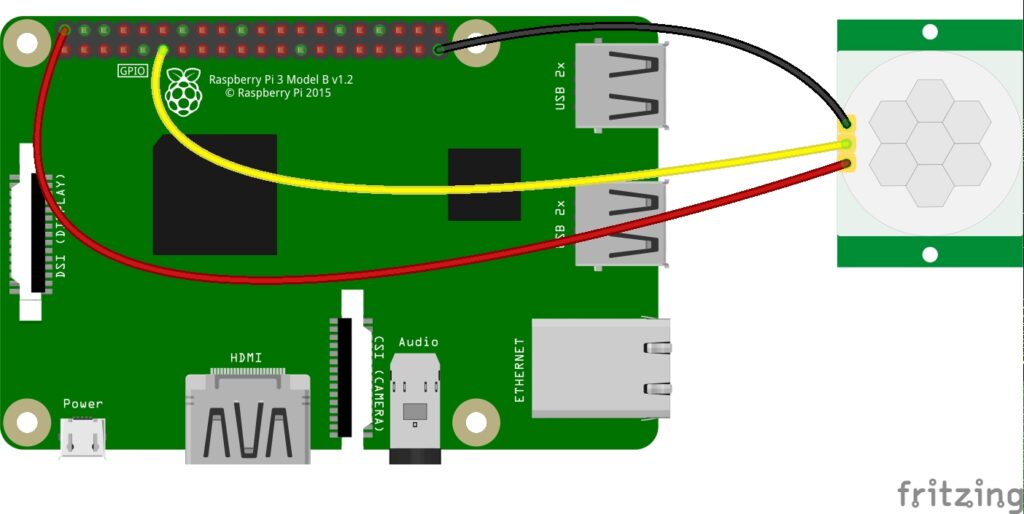
Step 2: Connecting the PIR Sensor
- Identify GPIO Pins: Locate the GPIO pins on the Raspberry Pi. Consult the pinout diagram for your specific Raspberry Pi model. Usually, the GPIO pins are found along the edge of the board.
- Connect PIR Sensor: Use jumper wires to connect the PIR sensor to the Raspberry Pi. Connect the sensor’s:
VCC pin to the 5V pin
GND to the ground pin
OUT to a GPIO pin (e.g., GPIO17)
Refer to the datasheet of your PIR sensor for specific pin details. - Breadboard Setup: If you’re using a breadboard, connect the jumper wires accordingly. This makes the setup modular and easy to disconnect if needed.
Step 3: Writing the Python Script
- Access the Raspberry Pi: Once your Raspberry Pi is set up, you can access it either through the terminal on the Pi itself or via SSH from another device.
- Install GPIO Zero Library: Open a terminal and install the GPIO Zero library, which simplifies working with GPIO pins.
   sudo apt-get update
sudo apt-get install python3-gpiozero- Write Python Script: Use a text editor (like Nano or Thonny) to write a Python script for motion detection. Save the script with a .py extension.
from gpiozero import MotionSensor
   import time

   pir = MotionSensor(17)

   while True:
       if pir.motion_detected:
           print("Motion detected!")
           # Add your desired action here
time.sleep(5) # To avoid rapid consecutive detections- Run the Script: Execute the script using the terminal.
python3 your_script_name.pyStep 4: Testing
- Trigger Motion: Move in front of the PIR sensor to trigger motion detection. You should see “Motion detected!” printed on the terminal.
- Adjust Sensitivity: Most PIR sensors have adjustable sensitivity and time delay settings. Refer to your sensor’s datasheet to customize these settings.
Step 5: Integration
- Expand Functionality: Modify the Python script to integrate with other components, such as turning on lights, capturing images, or sending notifications.
- Automation: Consider using tools like Cron to schedule when the motion detection script should run or integrate it into other home automation systems.
By following this step-by-step guide, you’ve successfully set up a motion detection system using a Raspberry Pi and PIR sensors. Experiment further to enhance its capabilities and integrate it into your projects!


