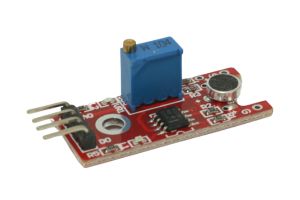
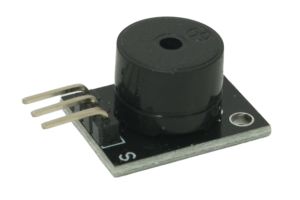
The Small Sound Sensor module is a compact component capable of detecting ambient sound levels and converting them into electrical signals. It enables your Arduino projects to interact with surrounding sounds, making it ideal for sound-activated applications. In this step-by-step guide, we’ll show you how to set up the Small Sound Sensor module with an Arduino and create projects that respond to sound inputs.
Materials Needed:
- Arduino board (e.g., Arduino Uno, Arduino Nano)
- Small Sound Sensor module
- Breadboard and jumper wires
- USB cable for Arduino
- Computer with the Arduino IDE installed (https://www.arduino.cc/en/software)
Step 1: Wiring
Connect the Small Sound Sensor module to the Arduino board as follows:
- Connect the module’s VCC (Voltage) pin to the 5V pin on the Arduino.
- Connect the module’s GND (Ground) pin to the GND pin on the Arduino.
- Connect the module’s AO (Analog Output) pin to an analog input pin on the Arduino (e.g., A0).
Step 2: Arduino Code
Open the Arduino IDE and create a new sketch. Then, enter the following code:
const int soundSensorPin = A0; // Analog pin connected to the Small Sound Sensor module's AO pin

void setup() {
  Serial.begin(9600); // Initialize serial communication for debugging (optional)
}

void loop() {
  int soundValue = analogRead(soundSensorPin); // Read the analog value from the sound sensor
  Serial.println(soundValue); // Print the sound value to the Serial Monitor (optional)

  // Adjust the threshold value according to your environment
  int threshold = 500;

  if (soundValue > threshold) {
    // Sound detected! Add your desired action here.
    // For example, turn on an LED or trigger other events.
  }

  delay(100); // Add a small delay to prevent rapid repeated detections
}
Step 3: Uploading the code
Connect your Arduino board to the computer using the USB cable and select the appropriate board and port from the Arduino IDE. Then, click the “Upload” button to upload the code to the Arduino.
Step 4: Observing the Sound Sensor Output
Once the code is uploaded successfully, open the Serial Monitor from the Arduino IDE (Ctrl + Shift + M). You will see analog values displayed on the Serial Monitor, which represent the sound level detected by the Small Sound Sensor module. Clap your hands or produce sound near the sensor to observe the values changing in response to the sound.
Step 5: Experiment and Interact
Now that the Small Sound Sensor module is set up and responding to sound, you can experiment with different threshold values to adjust the sensitivity to sound. Try triggering various actions, such as turning on LEDs, playing sounds, or activating motors, based on the detected sound levels. This module is perfect for creating sound-activated projects, interactive installations, and more!
Congratulations! You’ve successfully set up and used the Small Sound Sensor module with Arduino. By integrating this sensor into your projects, you can add sound-responsive features and create interactive experiences that respond to surrounding noises. Have fun experimenting and exploring the possibilities with the Small Sound Sensor module and Arduino!


