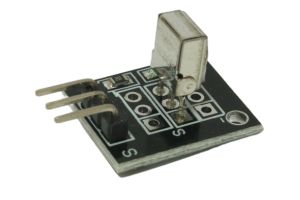
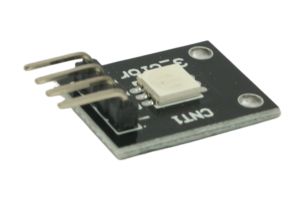
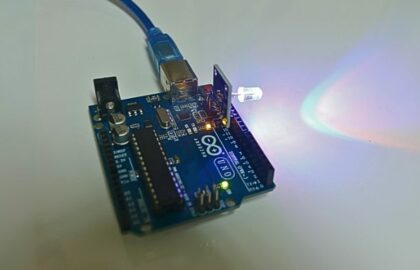
The IR Receiver Sensor Module is a versatile component that allows your Arduino projects to receive and decode infrared signals. It can be used in various applications, such as remote control systems, proximity sensing, and home automation projects. In this step-by-step guide, we’ll show you how to set up the IR Receiver Sensor Module with an Arduino and create projects that respond to infrared signals.
Materials Needed:
- Arduino board (e.g., Arduino Uno, Arduino Nano)
- IR Receiver Sensor Module (e.g., TSOP38238)
- IR Remote Control (compatible with the sensor module)
- Breadboard and jumper wires
- USB cable for Arduino
- Computer with the Arduino IDE installed (https://www.arduino.cc/en/software)
Step 1: Wiring
Connect the IR Receiver Sensor Module to the Arduino board as follows:
- Connect the module’s GND (Ground) pin to the GND pin on the Arduino.
- Connect the module’s VCC (Voltage) pin to the 5V pin on the Arduino.
- Connect the module’s OUT (Output) pin to a digital pin on the Arduino (e.g., D2).
Step 2: Installing the IR Remote Library
Before coding, you need to install the IR Remote Library in the Arduino IDE. Here’s how:
- Open the Arduino IDE.
- Go to “Sketch” > “Include Library” > “Manage Libraries…”
- In the Library Manager, search for “IRremote” and click “Install” for the “IRremote by shirriff” library.
Step 3: Arduino Code
Open the Arduino IDE and create a new sketch. Then, enter the following code:
#include <IRremote.h>

const int irReceiverPin = 2; // Digital pin connected to the IR Receiver Sensor module
IRrecv irReceiver(irReceiverPin);
decode_results results;

void setup() {
  Serial.begin(9600); // Initialize serial communication for debugging (optional)
  irReceiver.enableIRIn(); // Enable the IR Receiver
}

void loop() {
  if (irReceiver.decode(&results)) {
    // Print the received IR code to the Serial Monitor
    Serial.print("Received IR code: 0x");
    Serial.println(results.value, HEX);

    // Add your custom actions or functions based on the received IR code.

    irReceiver.resume(); // Enable the IR Receiver for the next reading
  }
}
Step 4: Uploading the code
Connect your Arduino board to the computer using the USB cable and select the appropriate board and port from the Arduino IDE. Then, click the “Upload” button to upload the code to the Arduino.
Step 5: Receiving IR Signals
Once the code is uploaded successfully, open the Serial Monitor from the Arduino IDE (Ctrl + Shift + M). The Serial Monitor will display the hexadecimal values of the IR codes received by the IR Receiver Sensor Module when you press buttons on the IR remote control.
Step 6: Experiment and Decode
Now that the IR Receiver Sensor Module is set up and receiving IR signals, you can experiment by pressing different buttons on the IR remote control. Each button press will generate a unique hexadecimal value, which you can decode to identify specific button functions.
Congratulations! You’ve successfully set up and used the IR Receiver Sensor Module with Arduino. This powerful sensor enables your Arduino projects to interact with infrared signals, making it perfect for remote control applications and proximity sensing. Have fun experimenting and incorporating the IR Receiver Sensor Module into your Arduino projects to decode the power of infrared insights!


