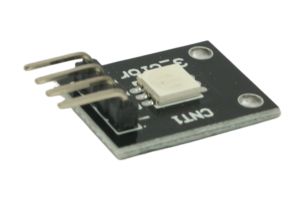
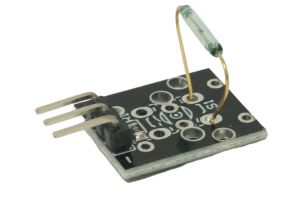
An SMD RGB module (Surface-Mount Device Red-Green-Blue module) is a compact and versatile component used to emit different colors of light using red, green, and blue LEDs. These modules typically come with four pins: one for the common cathode or anode and three pins for each color (R, G, B). By controlling the individual colors’ intensity, you can produce a wide range of colors.
Here’s a step-by-step guide on how to use an SMD RGB module with an Arduino board:
Required Components:
- Arduino board (e.g., Arduino Uno, Arduino Nano)
- SMD RGB module
- Breadboard and jumper wires
- 220-ohm resistors (optional, for current limiting)
- USB cable for Arduino
- Computer with the Arduino IDE installed (https://www.arduino.cc/en/software)
Step 1: Wiring
Connect the SMD RGB module to the Arduino board as follows:
- Connect the common cathode (or anode) pin to GND on the Arduino.
- Connect the R, G, and B pins of the module to digital pins on the Arduino (e.g., D9, D10, D11).
If you’re using resistors for current limiting (recommended), connect a 220-ohm resistor between each color pin and its corresponding digital pin on the Arduino.
Step 2: Arduino Code
Open the Arduino IDE and create a new sketch. Then, enter the following code:
const int redPin = 9;    // Connect the R pin to digital pin 9
const int greenPin = 10; // Connect the G pin to digital pin 10
const int bluePin = 11;  // Connect the B pin to digital pin 11

void setup() {
  // Set the pins as OUTPUT
  pinMode(redPin, OUTPUT);
  pinMode(greenPin, OUTPUT);
  pinMode(bluePin, OUTPUT);
}

void loop() {
  // Call the function to display different colors
  displayColor(255, 0, 0);   // Red
  delay(1000);               // Wait for 1 second
  displayColor(0, 255, 0);   // Green
  delay(1000);
  displayColor(0, 0, 255);   // Blue
  delay(1000);
  displayColor(255, 255, 0); // Yellow
  delay(1000);
  displayColor(0, 255, 255); // Cyan
  delay(1000);
  displayColor(255, 0, 255); // Magenta
  delay(1000);
  displayColor(255, 255, 255); // White
  delay(1000);
}

// Function to display a specific color
void displayColor(int redValue, int greenValue, int blueValue) {
  // Apply PWM (Pulse-Width Modulation) to each pin to control the color intensity
  analogWrite(redPin, redValue);
  analogWrite(greenPin, greenValue);
  analogWrite(bluePin, blueValue);
}
Step 3: Uploading the code
Connect your Arduino board to the computer using the USB cable and select the appropriate board and port from the Arduino IDE. Then, click the “Upload” button to upload the code to the Arduino.
Step 4: Observing the colors
Once the code is uploaded successfully, the SMD RGB module will display various colors, one at a time, with a 1-second delay between each color. You should see Red, Green, Blue, Yellow, Cyan, Magenta, and White colors displayed sequentially.
Now you have successfully used an SMD RGB module with Arduino to create different colors! You can modify the code to display other colors or even make it interactive by using sensors or buttons to control the colors dynamically. Experiment and have fun with your RGB module and Arduino!


