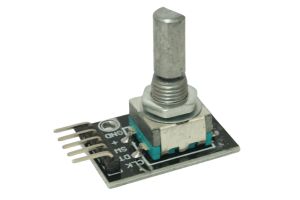
Introduction: The Rotary Encoders Module is a versatile input device that enables you to detect both the direction and number of rotations of a knob or shaft. It is commonly used in projects that require precise control, such as volume adjustment, menu selection, and motor control. In this step-by-step guide, we’ll show you how to set up the Rotary Encoders Module with an Arduino and create projects that respond to rotary movements.
Materials Needed:
- Arduino board (e.g., Arduino Uno, Arduino Nano)
- Rotary Encoders Module (with 3 pins: CLK, DT, and SW)
- Breadboard and jumper wires
- USB cable for Arduino
- Computer with the Arduino IDE installed (https://www.arduino.cc/en/software)
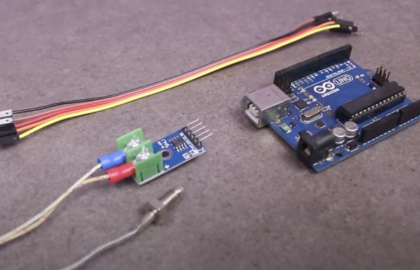
Step 1: Wiring
Connect the Rotary Encoders Module to the Arduino board as follows:
- Connect the module’s CLK (Clock) pin to a digital pin on the Arduino (e.g., D2).
- Connect the module’s DT (Data) pin to another digital pin on the Arduino (e.g., D3).
- Connect the module’s SW (Switch) pin to a digital pin on the Arduino (e.g., D4).
Step 2: Coding
Open the Arduino IDE and create a new sketch. Then, enter the following code:
// Pin numbers for the Rotary Encoders Module (Change these if you used different pins)
const int encoderCLK = 2; // Digital pin connected to CLK (Clock) pin of the Rotary Encoders Module
const int encoderDT = 3; // Digital pin connected to DT (Data) pin of the Rotary Encoders Module
const int encoderSW = 4; // Digital pin connected to SW (Switch) pin of the Rotary Encoders Module

volatile int encoderPos = 0; // Variable to store the current encoder position
boolean lastCLKState = LOW; // Variable to store the previous CLK state

void setup() {
  pinMode(encoderCLK, INPUT_PULLUP); // Set CLK pin as INPUT with internal pull-up resistor
  pinMode(encoderDT, INPUT_PULLUP); // Set DT pin as INPUT with internal pull-up resistor
  pinMode(encoderSW, INPUT_PULLUP); // Set SW pin as INPUT with internal pull-up resistor

  attachInterrupt(digitalPinToInterrupt(encoderCLK), handleEncoder, CHANGE); // Enable interrupt for CLK pin
}

void loop() {
  // Your main code can go here if you need to do other tasks.
  // The encoder position will be continuously updated in the handleEncoder function.
}

// Interrupt Service Routine (ISR) to handle the rotary encoder movement
void handleEncoder() {
  int currentCLKState = digitalRead(encoderCLK); // Read the current CLK state
  int currentDTState = digitalRead(encoderDT); // Read the current DT state

  // Update the encoder position based on the rotary direction
  if (currentCLKState != lastCLKState) {
    if (currentDTState != currentCLKState) {
      encoderPos++;
    } else {
      encoderPos--;
    }
  }

  lastCLKState = currentCLKState; // Save the current CLK state for the next interrupt
}
Step 3: Uploading the code
Connect your Arduino board to the computer using the USB cable and select the appropriate board and port from the Arduino IDE. Then, click the “Upload” button to upload the code to the Arduino.
Step 4: Reading the Encoder
Once the code is uploaded successfully, the Arduino will continuously monitor the rotary encoder’s movements. When you rotate the encoder knob, the variable encoderPos will be updated to reflect the number of rotations and the direction (clockwise or counterclockwise).
Step 5: Experiment and Control
Now that the Rotary Encoders Module is set up and reading the encoder, you can experiment by rotating the encoder knob. Observe the changes in the encoderPos variable, which indicates the number of rotations.
Congratulations! You’ve successfully set up and used the Rotary Encoders Module with Arduino. This versatile input device allows you to detect rotary movements and use them to control various aspects of your Arduino projects. Have fun experimenting and incorporating the Rotary Encoders Module into your Arduino projects for precise and interactive control!


