
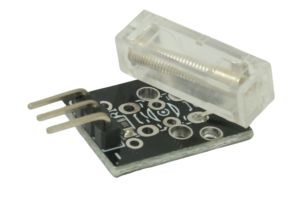
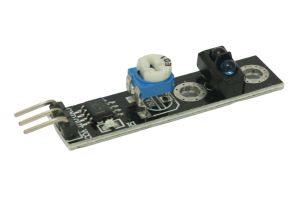
Introduction: The KY-028 Digital Temperature Sensor is a handy module for measuring temperature accurately with an Arduino. It uses the DS18B20 temperature sensor, which provides digital output and ensures precise temperature readings. In this step-by-step guide, we’ll show you how to set up the KY-028 Digital Temperature Sensor with an Arduino and create projects that monitor temperature in real-time.
Materials Needed:
- Arduino board (e.g., Arduino Uno, Arduino Nano)
- KY-028 Digital Temperature Sensor module (DS18B20)
- 4.7k ohm resistor (pull-up resistor)
- Breadboard and jumper wires
- USB cable for Arduino
- Computer with the Arduino IDE installed (https://www.arduino.cc/en/software)
Step 1: Wiring
Connect the KY-028 Digital Temperature Sensor to the Arduino board as follows:
- Connect the sensor’s VCC pin to the 5V pin on the Arduino.
- Connect the sensor’s GND pin to the GND pin on the Arduino.
- Connect the sensor’s Data pin to digital pin 2 on the Arduino.
- Place a 4.7k ohm resistor between the VCC pin and the Data pin of the sensor.
Step 2: Arduino Code
Open the Arduino IDE and create a new sketch. Then, install the “OneWire” and “DallasTemperature” libraries if you haven’t already. Go to “Sketch” > “Include Library” > “Manage Libraries…” and search for “OneWire” and “DallasTemperature.” Click “Install” for each library.
Next, enter the following code:
#include <OneWire.h>
#include <DallasTemperature.h>

#define ONE_WIRE_BUS 2 // Digital pin connected to the Data pin of the sensor

OneWire oneWire(ONE_WIRE_BUS);
DallasTemperature sensors(&oneWire);

void setup() {
  Serial.begin(9600); // Initialize serial communication for debugging (optional)
  sensors.begin();
}

void loop() {
  sensors.requestTemperatures(); // Request temperature reading
  float temperatureC = sensors.getTempCByIndex(0); // Get the temperature in Celsius

  // Display the temperature on the Serial Monitor
  Serial.print("Temperature: ");
  Serial.print(temperatureC);
  Serial.println(" °C");

  delay(1000); // Delay for one second before taking another reading
}
Step 3: Uploading the code
Connect your Arduino board to the computer using the USB cable and select the appropriate board and port from the Arduino IDE. Then, click the “Upload” button to upload the code to the Arduino.
Step 4: Monitoring the Temperature
Once the code is uploaded successfully, open the Serial Monitor from the Arduino IDE (Ctrl + Shift + M). The Serial Monitor will display the temperature readings in Celsius, updating every second. Place your fingers on the sensor to observe the changes in temperature.
Step 5: Experiment and Utilize
Now that the KY-028 Digital Temperature Sensor is set up and providing temperature readings, you can experiment with different use cases. For example, you can integrate it into a weather station project, a smart home system, or a temperature-controlled environment.
Congratulations! You’ve successfully set up and used the KY-028 Digital Temperature Sensor with Arduino. This versatile sensor allows you to measure temperature accurately and opens up a wide range of possibilities for creating temperature-sensitive projects and monitoring environmental conditions. Have fun experimenting and incorporating the KY-028 Digital Temperature Sensor into your Arduino projects to explore the world of temperature sensing!


