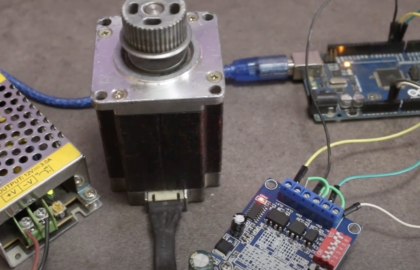
Sometimes we are required to check the RPM of the motor while creating projects. A few days back when I was creating a project that time I required an RPM Tachometer to check the rotational speed of the motor but did not have the RPM meter then I decided to make it myself as I know how to make it and I had all the equipment required.
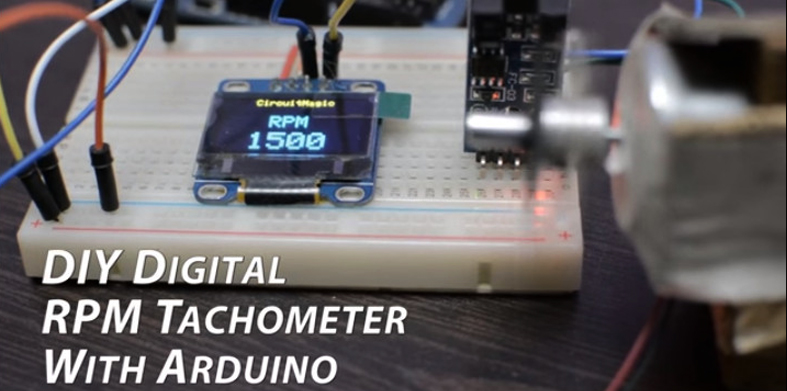
So in this article, I am going to explain you about DIY Digital RPM Tachometer with Arduino.
This article is about DIY digital RPM tachometer, After reading this article you will be able to check the speed of dc motor or any kind of rotational device.
So just the take the advantage and update yourself.
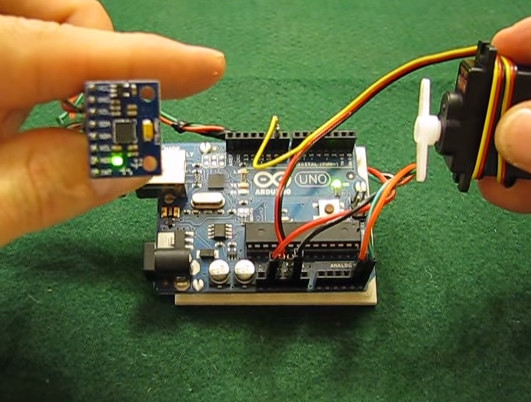
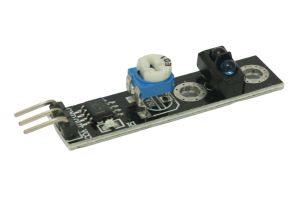
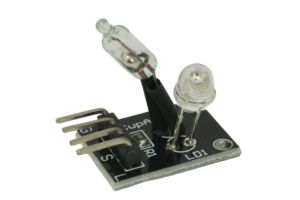
Following things are required to make RPM tachometer.
In the following video, you can find the working demo of the RPM Tachometer with Arduino
Arduino Code for RPM techometer
#include <SPI.h>
#include <Wire.h>
#include <Adafruit_GFX.h>
#include <Adafruit_SSD1306.h>
#define OLED_RESET 4
Adafruit_SSD1306 display(OLED_RESET);
#define NUMFLAKES 10
#define XPOS 0
#define YPOS 1
#define DELTAY 2
#define LOGO16_GLCD_HEIGHT 16
#define LOGO16_GLCD_WIDTH 16
static const unsigned char PROGMEM logo16_glcd_bmp[] =
{
B00000000, B11000000,
B00000001, B11000000,
B00000001, B11000000,
B00000011, B11100000,
B11110011, B11100000,
B11111110, B11111000,
B01111110, B11111111,
B00110011, B10011111,
B00011111, B11111100,
B00001101, B01110000,
B00011011, B10100000,
B00111111, B11100000,
B00111111, B11110000,
B01111100, B11110000,
B01110000, B01110000,
B00000000, B00110000
}
;
#if (SSD1306_LCDHEIGHT != 64)
#error("Height incorrect, please fix Adafruit_SSD1306.h!");
#endif
//------code for RPM----------------
int encoder_pin = 2;
// The pin the encoder is connected
unsigned int rpm;
// rpm reading
volatile byte pulses;
// number of pulses
unsigned long timeold;
// The number of pulses per revolution
// depends on your index disc!!
unsigned int pulsesperturn = 1;
void counter()
{
//Update count
pulses++;
}
//-----------------------------------
void setup() {
Serial.begin(9600);
// by default, we'll generate the high voltage from the 3.3v line internally! (neat!)
display.begin(SSD1306_SWITCHCAPVCC, 0x3C);
// initialize with the I2C addr 0x3D (for the 128x64)
// init done
// Show image buffer on the display hardware.
// Since the buffer is intialized with an Adafruit splashscreen
// internally, this will display the splashscreen.
//display.display();
//delay(2000);
// Clear the buffer.
//display.clearDisplay();
// draw a single pixel
//display.drawPixel(10, 10, WHITE);
// Show the display buffer on the hardware.
// NOTE: You _must_ call display after making any drawing commands
// to make them visible on the display hardware!
//display.display();
//delay(2000);
//-----------code for RPM---------------
//Use statusPin to flash along with interrupts
pinMode(encoder_pin, INPUT);
//Interrupt 0 is digital pin 2, so that is where the IR detector is connected
//Triggers on FALLING (change from HIGH to LOW)
attachInterrupt(0, counter, FALLING);
// Initialize
pulses = 0;
rpm = 0;
timeold = 0;
}
void loop()
{
if (millis() - timeold >= 1000){
/*Uptade every one second, this will be equal to reading frecuency (Hz).*/
//Don't process interrupts during calculations
detachInterrupt(0);
//Note that this would be 60*1000/(millis() - timeold)*pulses if the interrupt
//happened once per revolution
rpm = (60 * 1000 / pulsesperturn )/ (millis() - timeold)* pulses;
timeold = millis();
pulses = 0;
//Write it out to serial port
Serial.print("RPM = ");
Serial.println(rpm,DEC);
updateDisplay(rpm);
//Restart the interrupt processing
attachInterrupt(0, counter, FALLING);
}
}
int valLen;
int displayWidth = 128;
int letterWidth = 18;
void updateDisplay(int rpm){
if(rpm > 9999)
valLen = 5;
else if(rpm > 999)
valLen = 4;
else if(rpm > 99)
valLen = 3;
else if(rpm > 9)
valLen = 2;
else
valLen = 1;

//-------------update display------------

display.clearDisplay();
// text display tests
display.setTextSize(1);
display.setTextColor(WHITE);
display.setCursor(30,0);
display.println("CircuitMagic");
display.setTextColor(BLACK, WHITE);
// 'inverted' text
//display.println(3.141592);
display.setTextSize(2);
display.setTextColor(WHITE);
display.setCursor(45,20);
display.println("RPM");
display.setCursor((displayWidth/2)-(letterWidth/2*valLen),42);
display.setTextSize(3);
display.println(rpm);
// display.println(0xDEADBEEF, HEX);
display.display();
//----------------------
}


Did you notice at the beginning of your sketch code that the library ‘includes’ are blank?
hi, my name is anuar, I student system automotive enginner, I have a question about the programming code. What libraries are included to run the screen, just say inluide.
Greetings from Mexico
i am a newbie and, i am trying to learn this display, so i copied the code and there are many errors coming up the the display has not been defined? I was able to get the example code for the display to work.
Your code is missing the library names in the include statements. Is there an updated copy of the source that has the correct include statements?
Hi, excellent post. I have completed the prevoius test with the OLED display using the Scan code. It was perfect!!! However, now I’m trying to run the current code to make the RPM meter and an error appers in the line “display.setTextSize(1);”, during the compilation. Can you help me please? Thanks in advance. Jose.
Hi, excellent project. I have completed the previous test using the Scan code for the OLED display, and it worked perfectly. However, now I’m trying to run the current code in order to make the RPM meter but an error is coming up just in the line “display.setTextSize(1)”. The error message is: ‘class Adafruit_SSD1306’ has no member named ‘setTextSize’. Any help, please??? Thanks in advance, jose.
Hi actually this project is really good… But only thing that is missing is that header files in arduino code…. so plz let me know all the header files used in it…. Waiting for your reply…
can you include the libraries???
What accuracy can you get at 50 000 rpm X 2 pulses/rev with a Uno?
I will not watch this video until I get this answer.
A shame, this is exactly what I need. But I don’t think we are going to get an answer on the missing header information.
Here is one of them… https://github.com/adafruit/Adafruit_SSD1306
The sketch compiles with these three libraries…
#include
#include
#include
I am not sure what the fourth one is, and I have not yet tested for proper operation.
I found the project on Youtube, which has led me here. The code on Youtub shows
#include
#include
#include
#include
[Moderator, please remove my previous comments.]
The sketch compiles with these three libraries…
Adafruit_GFX.h
gfxfont.h
Adafruit_SSD1306.h
I am not sure what the fourth one is, and I have not yet tested for proper operation.
It was the angle brackets that prevented the names from being displayed.
hello
Could you please tell me if I am able to use another LCD LCD1602+I2C?
What kind of adjustments should I make?
Thanks a lot
please give me the full source code, its important to me
please reply as soon as posible
not working stray 342 error
sir very nice project i need its circuit diagram .you didnt wire connections of the project
I am working with this project to get an RPM readout for my metal lathe. I got it to work, however the display is at the top of the screen and i can only see half of the readout. Does anyone have any idea what i’m doing wrong?
Thanks
Please disregard. I was using a 1.3″ LED. Now just to get the tach to work with the new .h file
I have the variable speed motor and the tach working on my metal lathe. However, the RPM jumps back and forth and sometimes misread all together. I have studied the code and can’t figure out if I can slow down the sample rate to possibly get a smoother read out. Does anyone have any suggestions how to solve this? Thank you.
I’m curious as to why the RPM readings are fluctuating between 1440 and 1560 in the video. I also see that in the example I built. Is there something in the code that causes the reading to be inaccurate? I’ve used a bench top function generator to provide an absolute pulse to emulate a stable RPM (not a motor that may deviate) and the fluctuations still occur. Watching them shows the range of deviation is constantly the same. as if there is a timing issue.
Because the approach is inaccurate and gives a result that is always a multiple of 60. A not accurate approach is to use micros() instead of millis(). The start time and the last interrupt time is recorded in micros(). You need to check if the elapsed time is negative (meaning micros() has rolled over in which case you need to correct. There is a bit more to it than that but it will give you 250x more resolution on a 16 MHz Arduino.
Apparently the thread is not being monitored. No response to my question above.
Hello Nice code. I was want to make a counter of steps from a stepper motor. But I don’t think the display can be updated quick enough. What do you think?
were have all working library link.