Want to try a small electronics project without complicated circuits? In this beginner tutorial, we’ll build detect loud sound using arduino and sound sensor module. You’ll connect one sensor, upload a short Arduino IDE sketch, and see the result. No Wi-Fi account or cloud service is required.
What does it do?
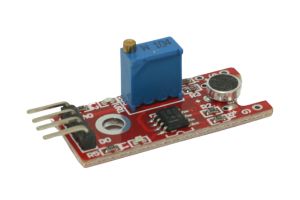
A microphone board with a comparator switches its digital output when sounds exceed an adjustable threshold. This detects loud events, not spoken words or accurate decibels.
Parts you’ll need
Arduino Uno, KY-038 or compatible digital microphone sound sensor module, LED, 220-ohm resistor, wires. You will also need a computer with the free Arduino IDE installed.
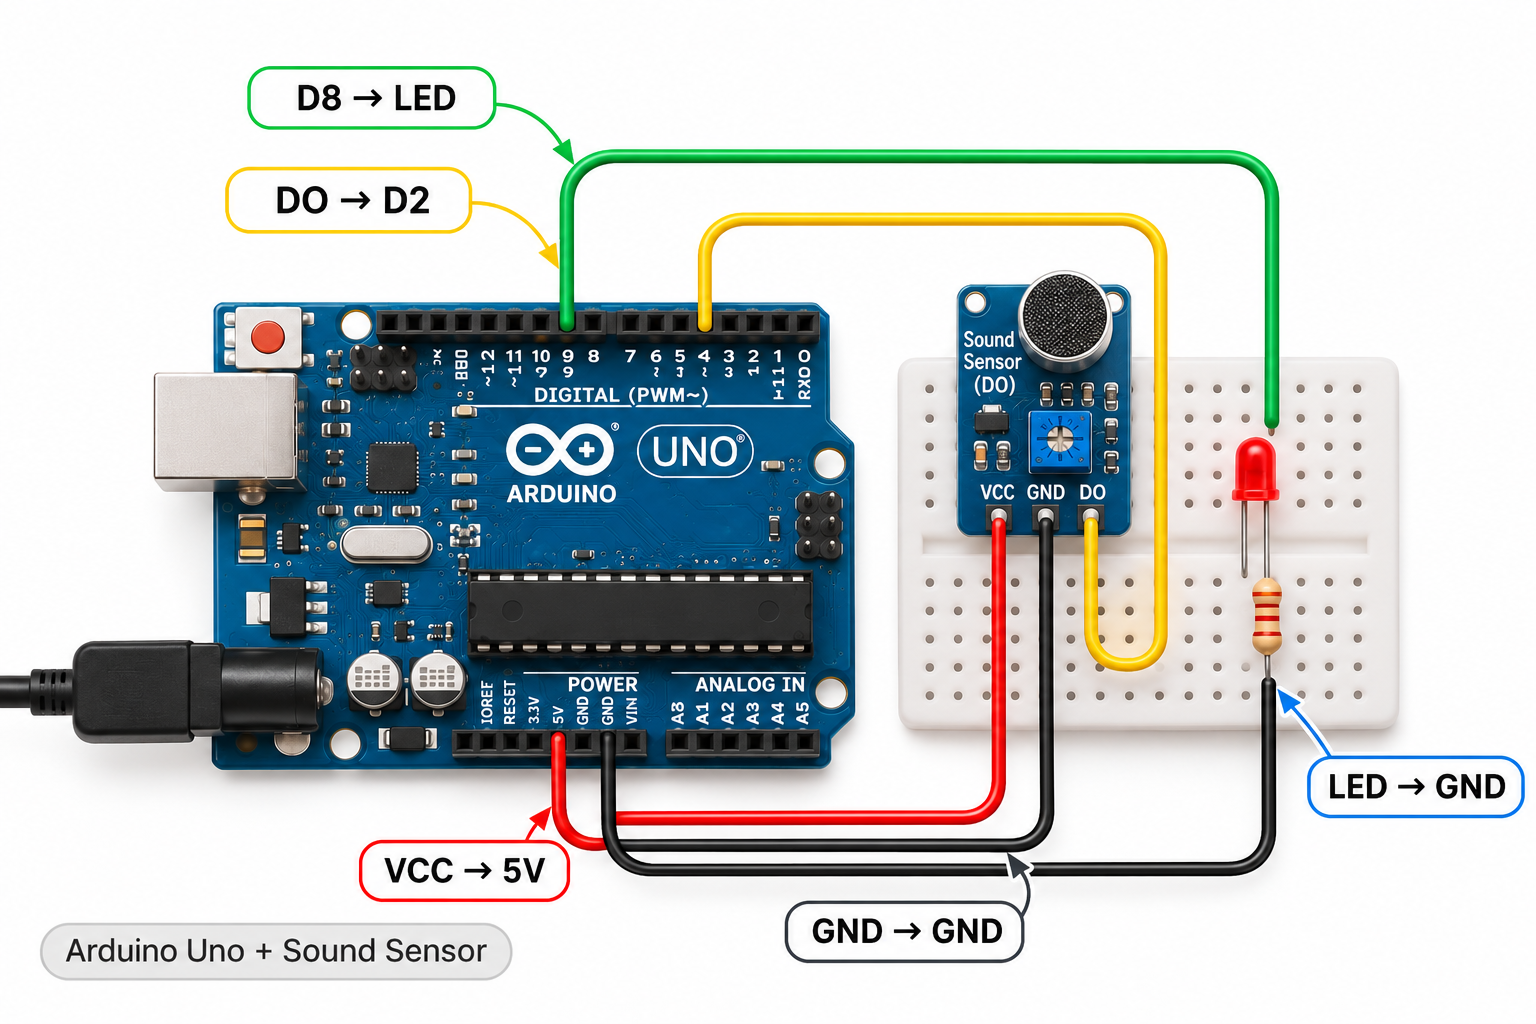
Wiring connections
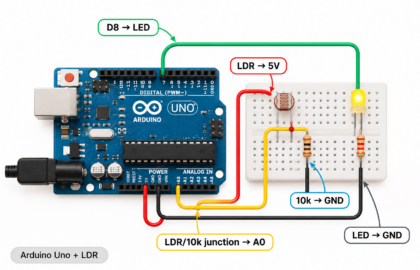
Disconnect USB power before moving any wires. Make these connections carefully:
| Sensor / component pin | Connect to |
|---|---|
| Module + | 5V |
| Module G | GND |
| Module DO | D2 |
| D8 | 220-ohm resistor → LED anode |
| LED cathode | GND |
Important: ESP32 GPIO pins work at 3.3V. Do not connect a 5V output directly to an ESP32 input. Board and sensor-module pin labels vary, so double-check the markings on your hardware.
Arduino IDE code
Select the correct board and USB port in Arduino IDE, paste the complete sketch below, and click Upload.
const int soundPin = 2;
const int ledPin = 8;
void setup() {
  Serial.begin(9600);
  pinMode(soundPin, INPUT);
  pinMode(ledPin, OUTPUT);
}
void loop() {
  bool loud = digitalRead(soundPin) == LOW;
  digitalWrite(ledPin, loud ? HIGH : LOW);
  if (loud) Serial.println("Loud sound detected");
  delay(50);
}
Expected result
Clap near the sensor and the LED briefly lights. Open Tools → Serial Monitor and set the baud rate shown in Serial.begin() in the sketch.
Troubleshooting
Adjust the small potentiometer until an ordinary clap triggers the LED. Digital output polarity may differ across sound modules; invert the comparison if yours triggers when quiet.
If nothing appears, first check the USB cable, correct board and port, sensor power and ground, and the Serial Monitor baud rate. Recheck every wire against the connection table before changing code.
What to try next
Once this simple example works, try changing the measurement interval or using the sensor reading to control an LED. This is an easy way to learn inputs, outputs, and basic programming.
For more hands-on electronics tutorials, explore CircuitMagic. If you later want to control Arduino or ESP32 projects from a phone over Bluetooth, see our BLE Controller app tutorial. This project itself does not need Bluetooth.